

News
 (5.0)
(5.0)
How to Replace a Trimmer Line in Seconds
Maintaining your string trimmer in peak condition often hinges on one small but crucial task: replacing the trimmer line. Whether your line has snapped, worn down, or simply run out, knowing how to reload it efficiently saves time and frustration. With a few straightforward steps, even beginners can master this essential garden chore quickly and get back to trimming in no time.
Understanding Your Trimmer's Spool
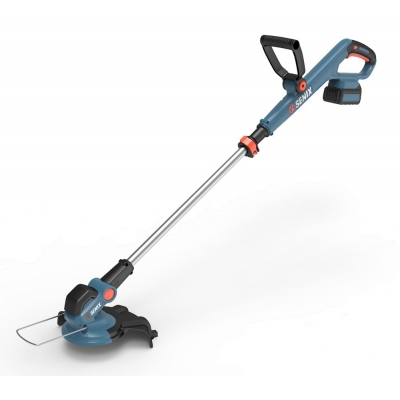
Before diving into the replacement process, it helps to understand the type of trimmer you own. Most string trimmers have either a bump-feed or a fixed spool system. The bump-feed allows the line to be released by tapping the head on the ground, while fixed spool systems require manual adjustment. Knowing this will guide you on how to handle the spool correctly.
Tools and Materials Needed
Replacement trimmer line (check your trimmer's manual for the right diameter and type)
Scissors or garden shears (optional)
Clean workspace
Step 1: Power Off and Prepare the Trimmer
Safety is paramount. Always ensure the trimmer is turned off and disconnected from any power source—unplug electric models or remove the battery on cordless units. For gas models, make sure the engine is cool before handling.
Step 2: Remove the Spool Cover
Most trimmers have a spool cover held in place by clips or screws. Press the tabs or unscrew the fasteners carefully to access the spool inside. Keep track of all parts to avoid losing anything during reassembly.
Step 3: Take Out the Old Line
Pull out any remaining old line from the spool. If the spool is empty, you're ready for the new line. If not, clean out any debris or tangled bits to prevent jams later.
Step 4: Cut and Insert New Line
Cut a length of new line recommended by your trimmer's manual, usually between 10 to 25 feet. Some spools have a notch to anchor the line's end — insert one end into this notch. For dual-line spools, repeat with the second line segment.
Step 5: Wind the Line Evenly
Turn the spool in the direction indicated (usually marked on the spool itself) to wind the line neatly and tightly. Avoid overlaps or loose coils, which can cause feeding problems. Leave about 6 inches of line free at the spool's edge.
Step 6: Secure the Line and Reassemble
Snap the line into the retaining slots to keep it from unraveling. Replace the spool cover securely, ensuring it clicks or screws back into place firmly.
Step 7: Test the Trimmer
Reconnect power or reinsert the battery, and give the trimmer a quick test run. Tap the head (if bump-feed) or check the line feed mechanism to confirm everything works smoothly.
Tips for a Faster Line Replacement
Keep pre-cut line segments handy for quick swaps.
Use trimmer line designed specifically for your model to avoid compatibility issues.
Clean your spool regularly to prevent buildup that slows down winding.
Watch a quick tutorial video for your trimmer model to see the process visually.
Replacing your trimmer line doesn't have to be a time-consuming hassle. With these simple steps, swapping out your line can be done in seconds, letting you maintain your garden efficiently. Regular maintenance like this keeps your tools running smoothly and extends their lifespan — a small effort with a big payoff.